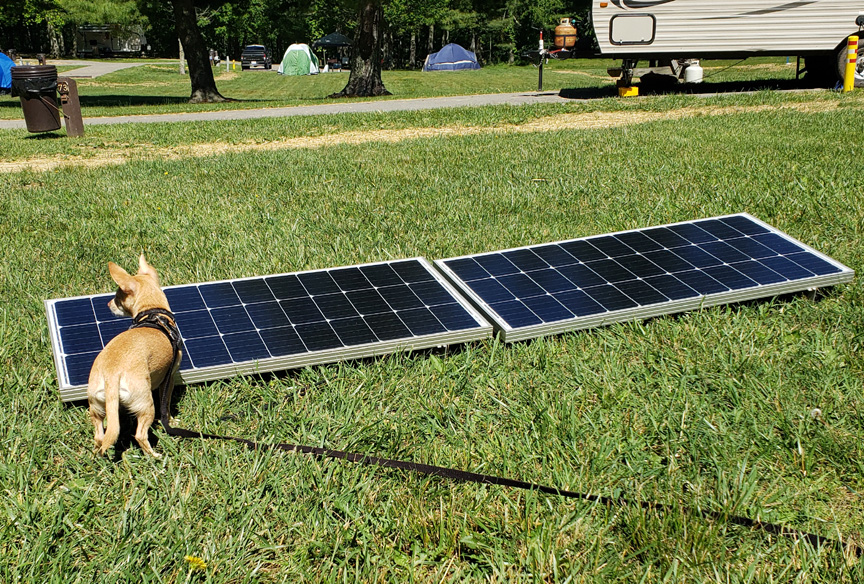
This is an edited and recycled Amazon review I did after installing our inverter. The product is no longer available but the info is still relevant. I had just installed the solar and PWM controller that came with the panels, later pics show the Victron MPPT Bluetooth charge controller which is infinitely better. When the camper is idle I deploy one panel to keep the batteries up.
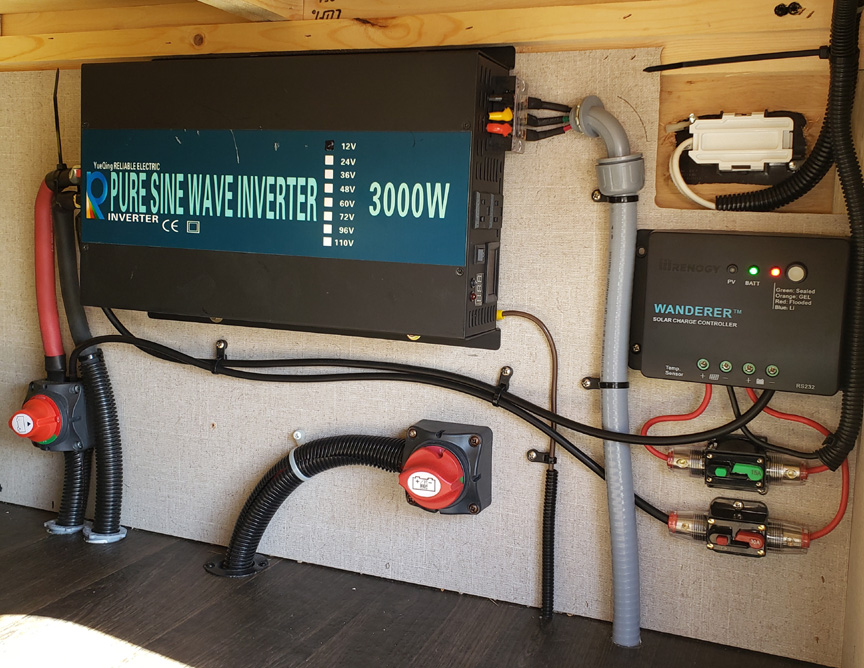
- Inverter
- 4/0 cable from battery bank to inverter area (7′ in my case)
- 4/0 jumper cable from kill switch to inverter (12″ in my case)
- 4/0 jumpers to parallel batteries (12″ in my case with group 24 battery, use same gauge here as for the rest of your install, see above for link)
- Battery kill switch
- Class T fuse block (300 amp is appropriate for this inverter, 250 would work but that’s an odd size fuse)
- Power whip assembly
- Outside weatherproof power box
- Weatherproof cover for power box
- 30 amp rv outlet.
- Wire loom
- Cable clamps
- Screw down wire ties
- spade terminals for hard wiring to unit, loop terminals for the ground wire
- shrink tubing
- 8 or 10 gauge wire and terminal ends for ground cable
- misc. screws and hardware
- dual battery box
- Conduit reducers to protect the cables where they pass through the floor
- If it doesn’t have a link it’s something I had on hand, the links above may be old.
Amps that should never meet (transfer switches)
My main electrical panel is towards the rear of the camper and would have required a lot of work and wiring to install a transfer switch. It’s really not necessary, dry camping we’re either plugged into the generator or the inverter and with only one cord there’s no way to confuse things. When we have shore power that’s where it’s plugged in. What you will need to do is to isolate your inverter/charger that came with the camper so you don’t have a loop where the new inverter is powering the inverter/charger which is trying to charge the battery which is powering your new inverter. My inverter/charger wasn’t marked on my electrical panel but I traced the wire to a breaker marked “GEN” that was shared with another device which after consulting the manufacturer was the refrigerator. If you search your electrical panel by model number you can see what breakers are compatible and split the inverter/charger off to its own 15amp circuit breaker. Turn this off when using the new inverter. Another power saving step is to install a switch for the heat strip that lives between the freezer and refrigerator on most RV refrigerators. It’s a power gremlin that you can live without when dry camping. Google it.
The output lead drops down on the outside of the frame rail, the material on the whip is so tough there was no extra insulation needed where it passes through the floor. I probably cut 3’ off the whip I ordered. I elected to use the RV plug rather than a standard outlet so no adapter needed. You can’t see it from outside the camper unless you’re on the ground and it’s protected from the elements. If you wanted to skip this step you could just plug directly into the inverter, but then again it’s ½ power and you have to leave the garage door cracked.
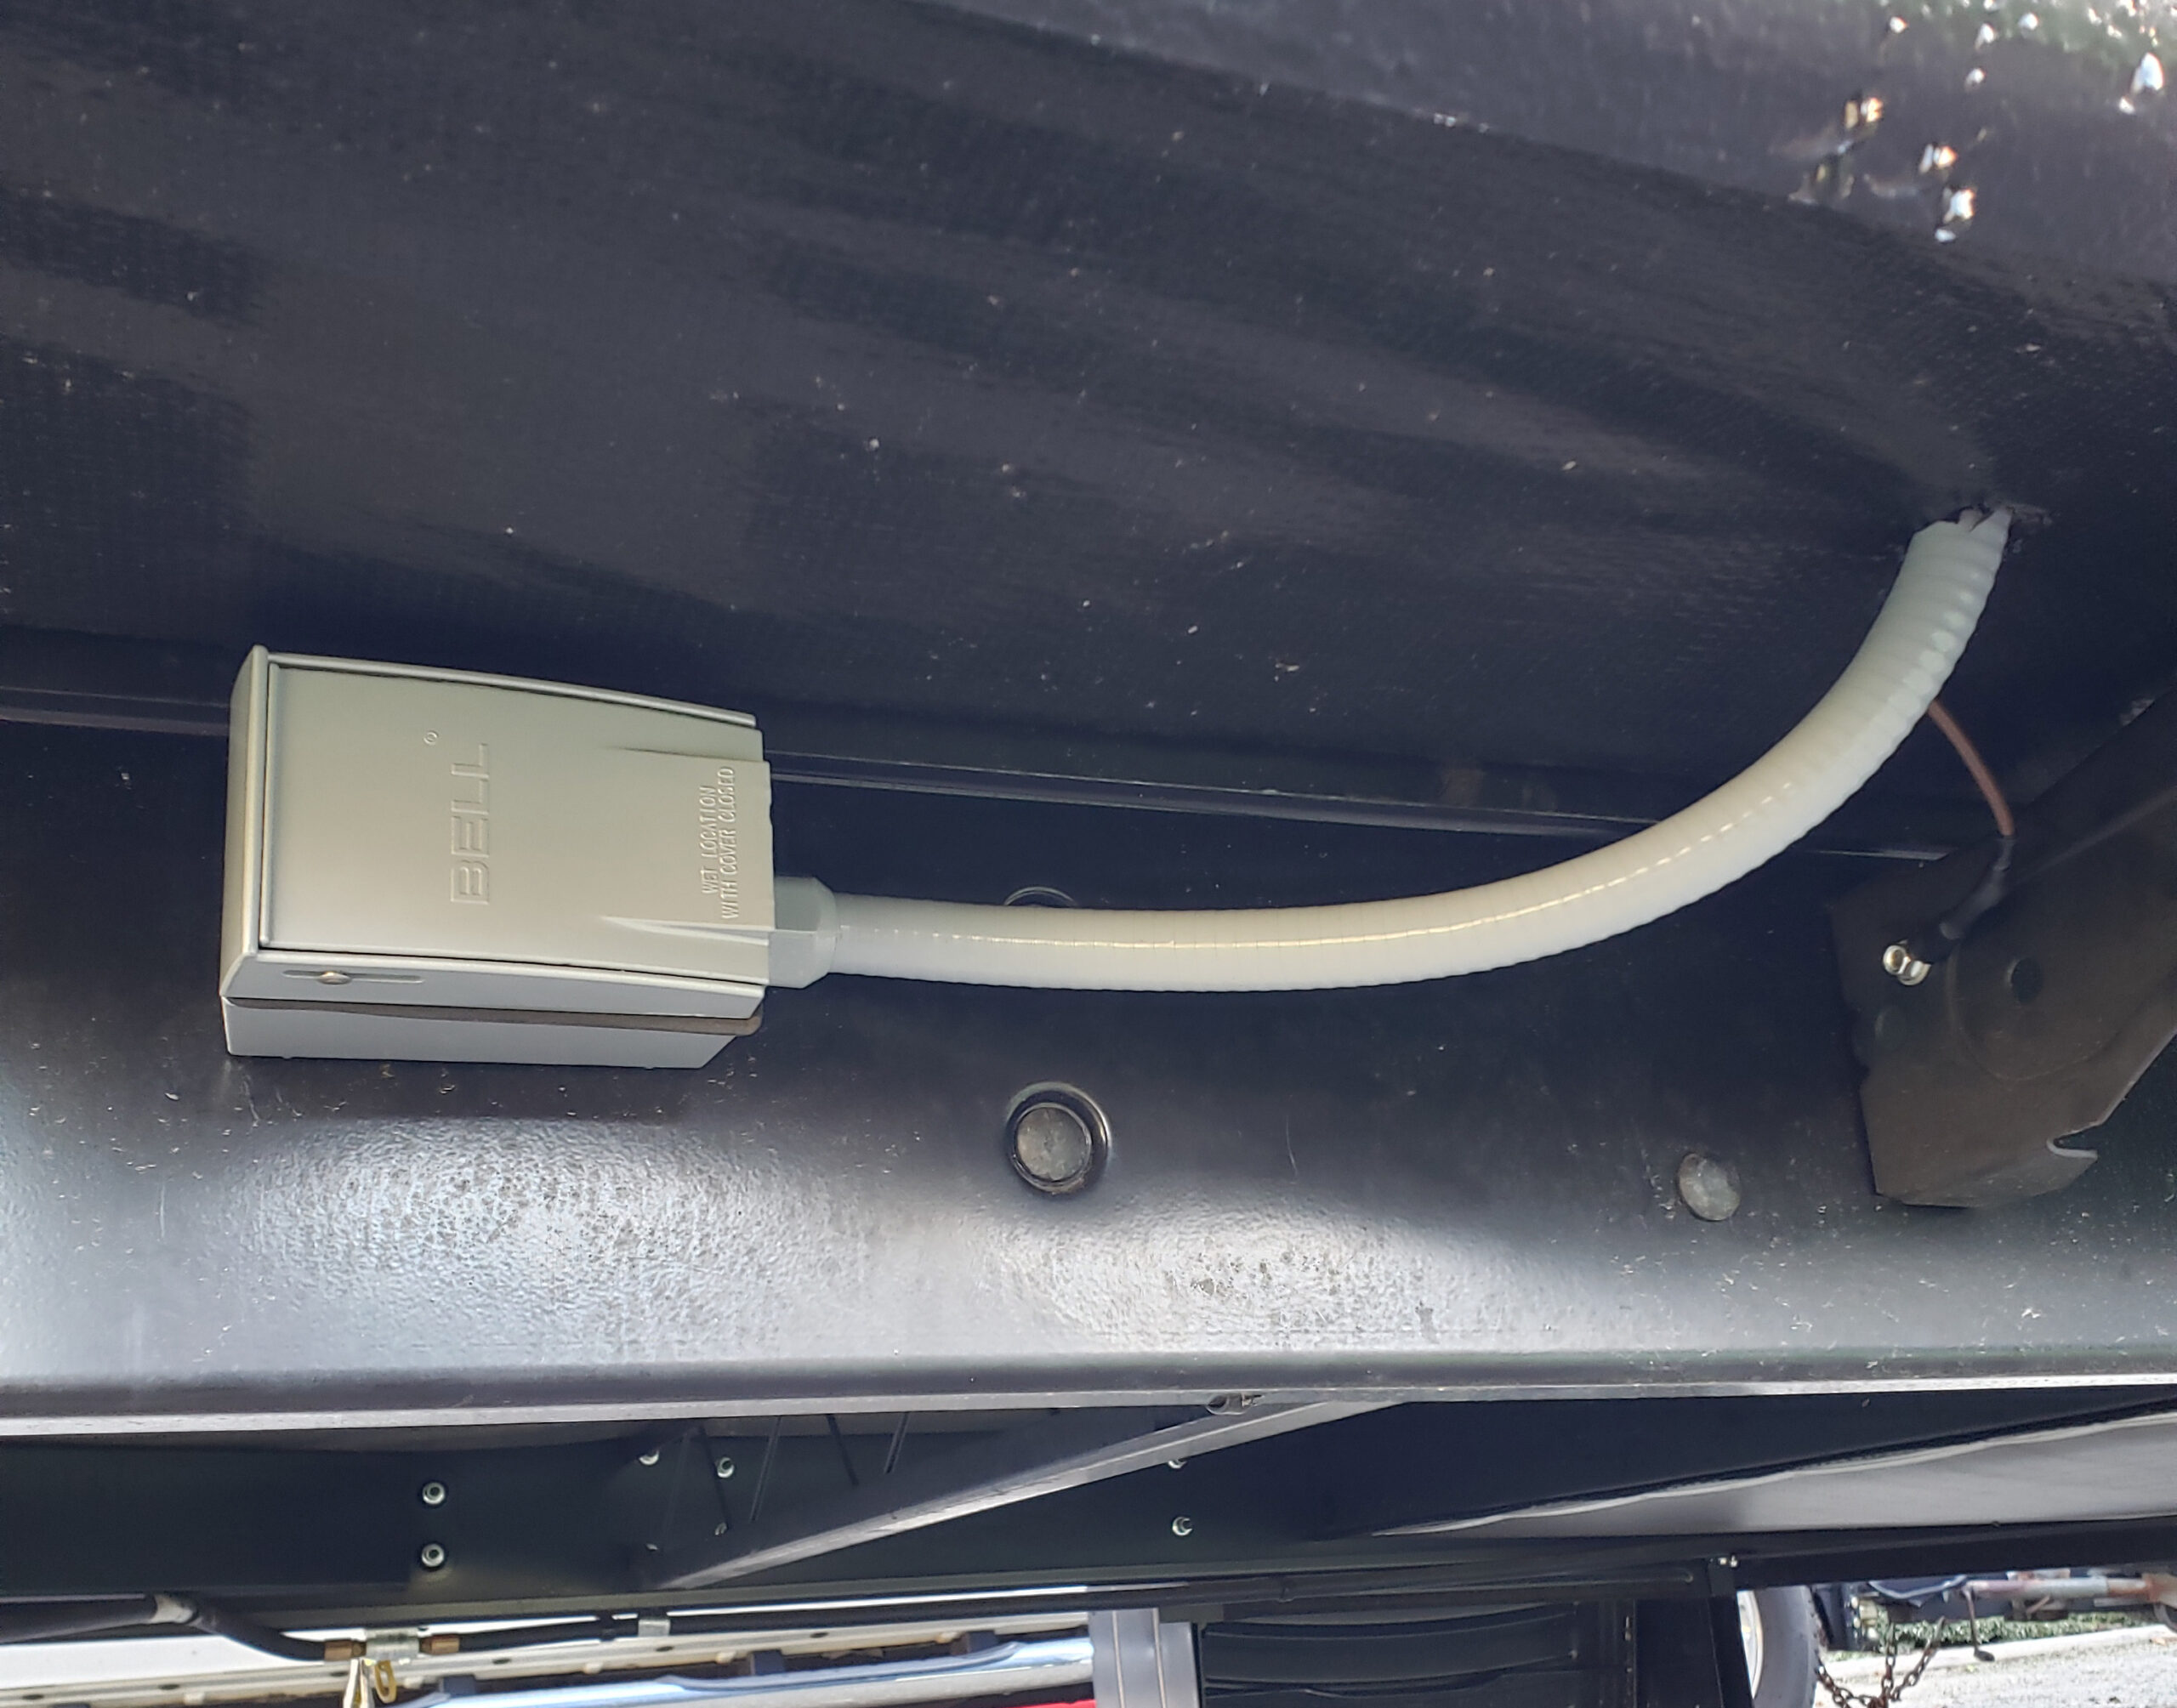
Inverter outlet with an RV 30 amp plug inside (no adapters). The wire on the right is the ground for the inverter.
When dropping leads and drilling big holes in your camper you’ll need to be aware of where frame members and other wiring or plumbing might be. A small pilot hole and a piece of straight coat hanger helped me locate the exit hole in the membrane under the camper which I cut with an exacto to allow the cables to pass through with minimal disturbance of the membrane and insulation. I had to make a slit to install the angle bracket and support, but some Gorilla tape sealed that back up along with a few gaping holes left by the factory.
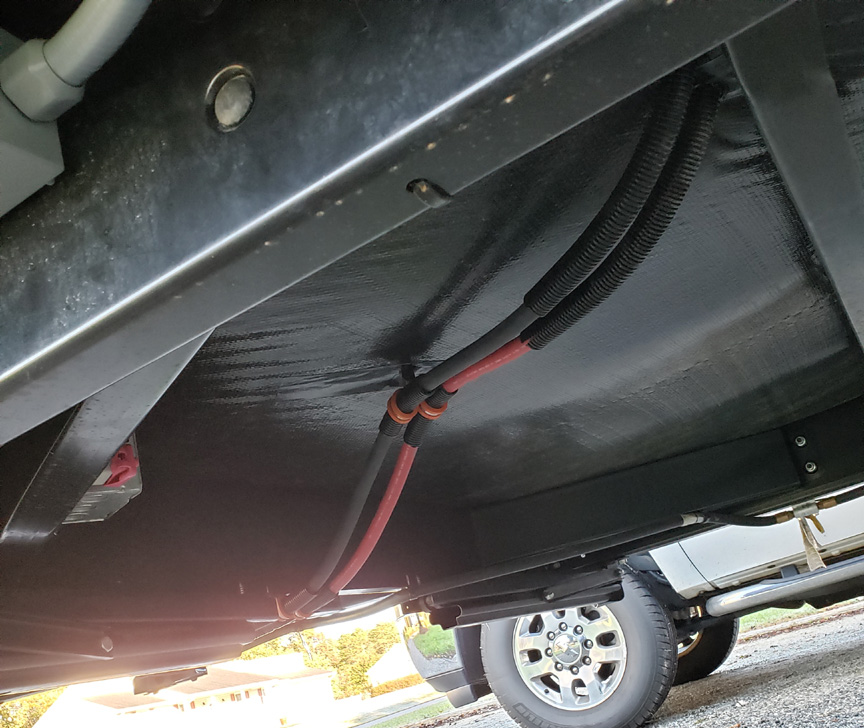
Cable runs from inverter to battery box
Camco makes a double battery box that holds two group 24 size batteries which maxed out the available space on my tongue. It has an extra tall lid that accommodates the class T fuse block and the parallel cables nicely. Lithiums are usually group 24 size if you upgrade at some point.
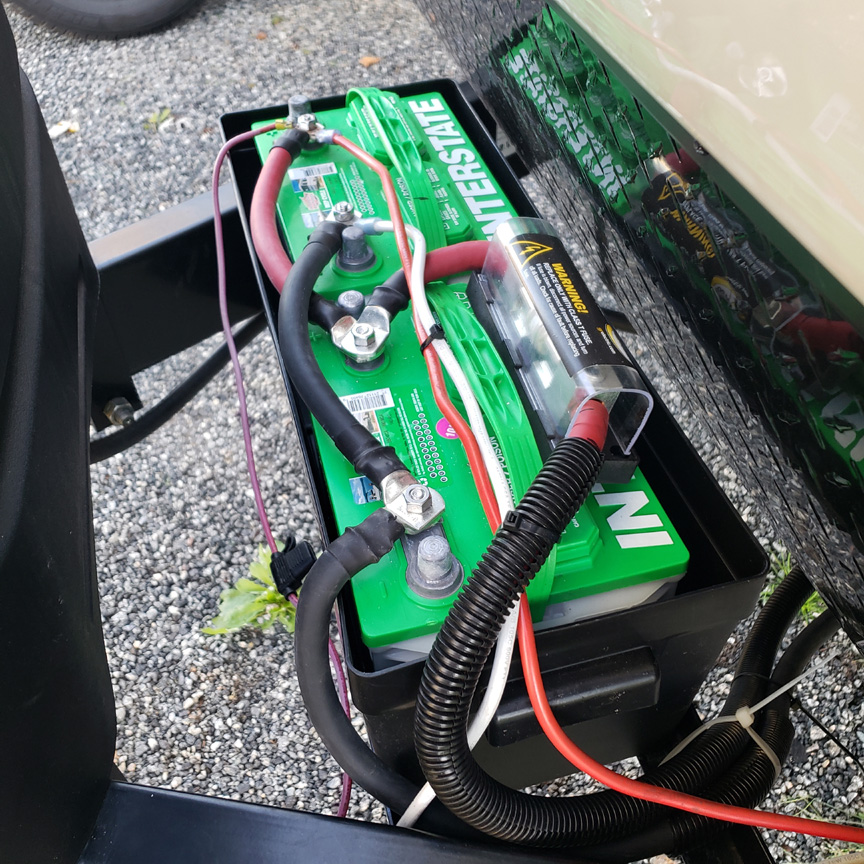
Battery bank, class T fuse
Video of the inverter in action
Solar
Bruce verifying our panel angles to make sure we have maximum insolation
Doing a solar panel after your inverter install starts to make sense because of the new wiring that’s available. Rather than run new wiring all the way to the batteries you can simply connect the charge controller to the new 4/0 cables you ran for the inverter. The factory supplied “Solar Ready” Zamp plug is a nice idea but the wire gauge is too small once you get past a certain amount of solar plus the polarity is reversed. I found an identical plug with the right polarity and heavier leads, mounted it in place of the factory Zamp plug and use this to bring the power into the TT from the panels.
I’m using a pair of Renogy 100W panels which can be deployed to where the sun is. I’ve gone back and forth on mounting them on the roof, but we prefer shaded campgrounds and there’s not much negotiation on where the TT will fit. With enough cable I can usually get these in the sun.
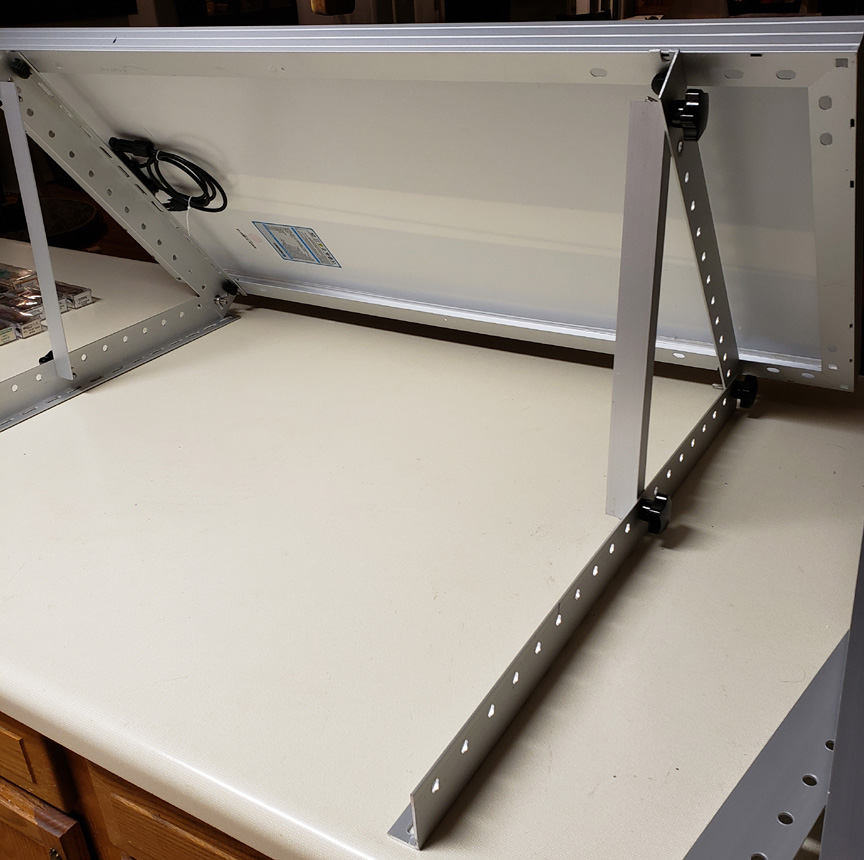
With some modifications and thumb screws the Renogy mounts can be modified for quick adjustment and storage
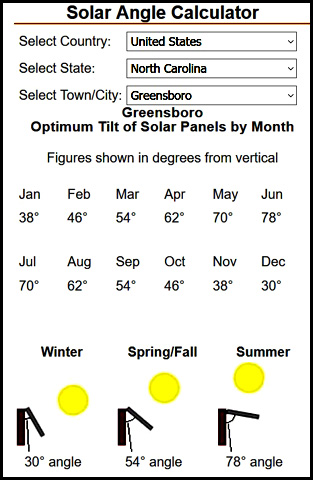
Facing south is almost always ideal, with a bubble level app on your phone you can maximize your power
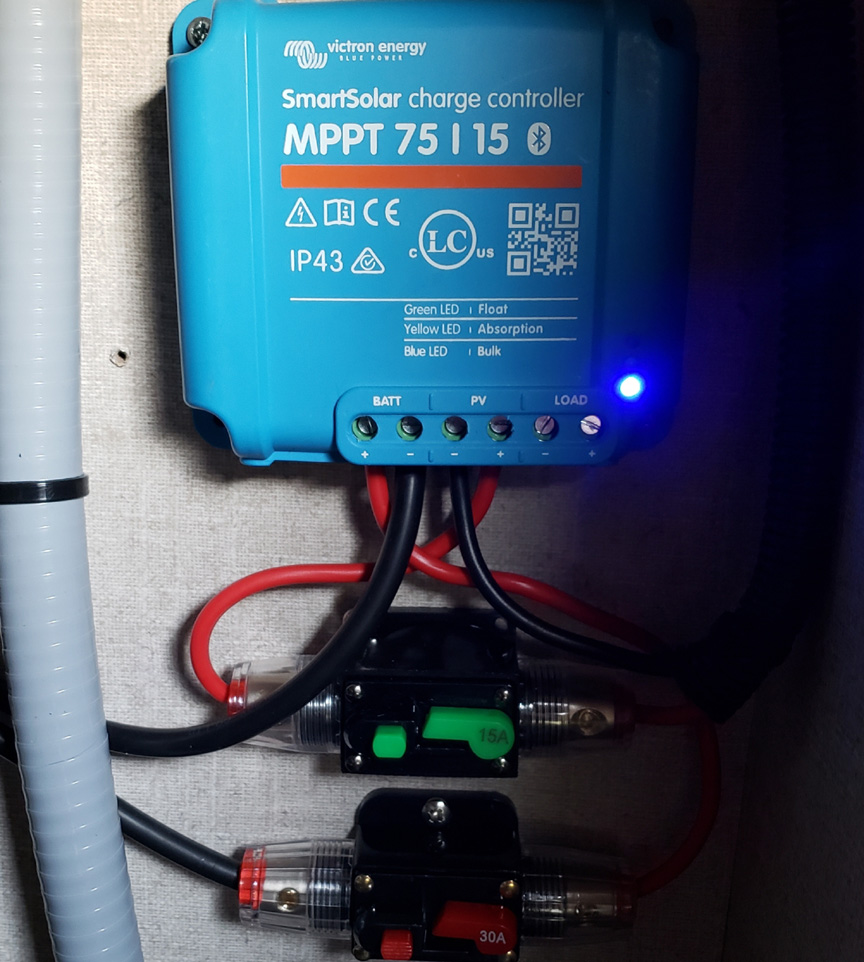
I started with the PWM charge controller that came with my first panel, but quickly upgraded to a Victron Bluetooth charge controller. These are able to almost double the amount of power you can harness from your panel and are adept at making the best power when you don’t have direct sunlight. The Bluetooth feature let you see what’s going on.
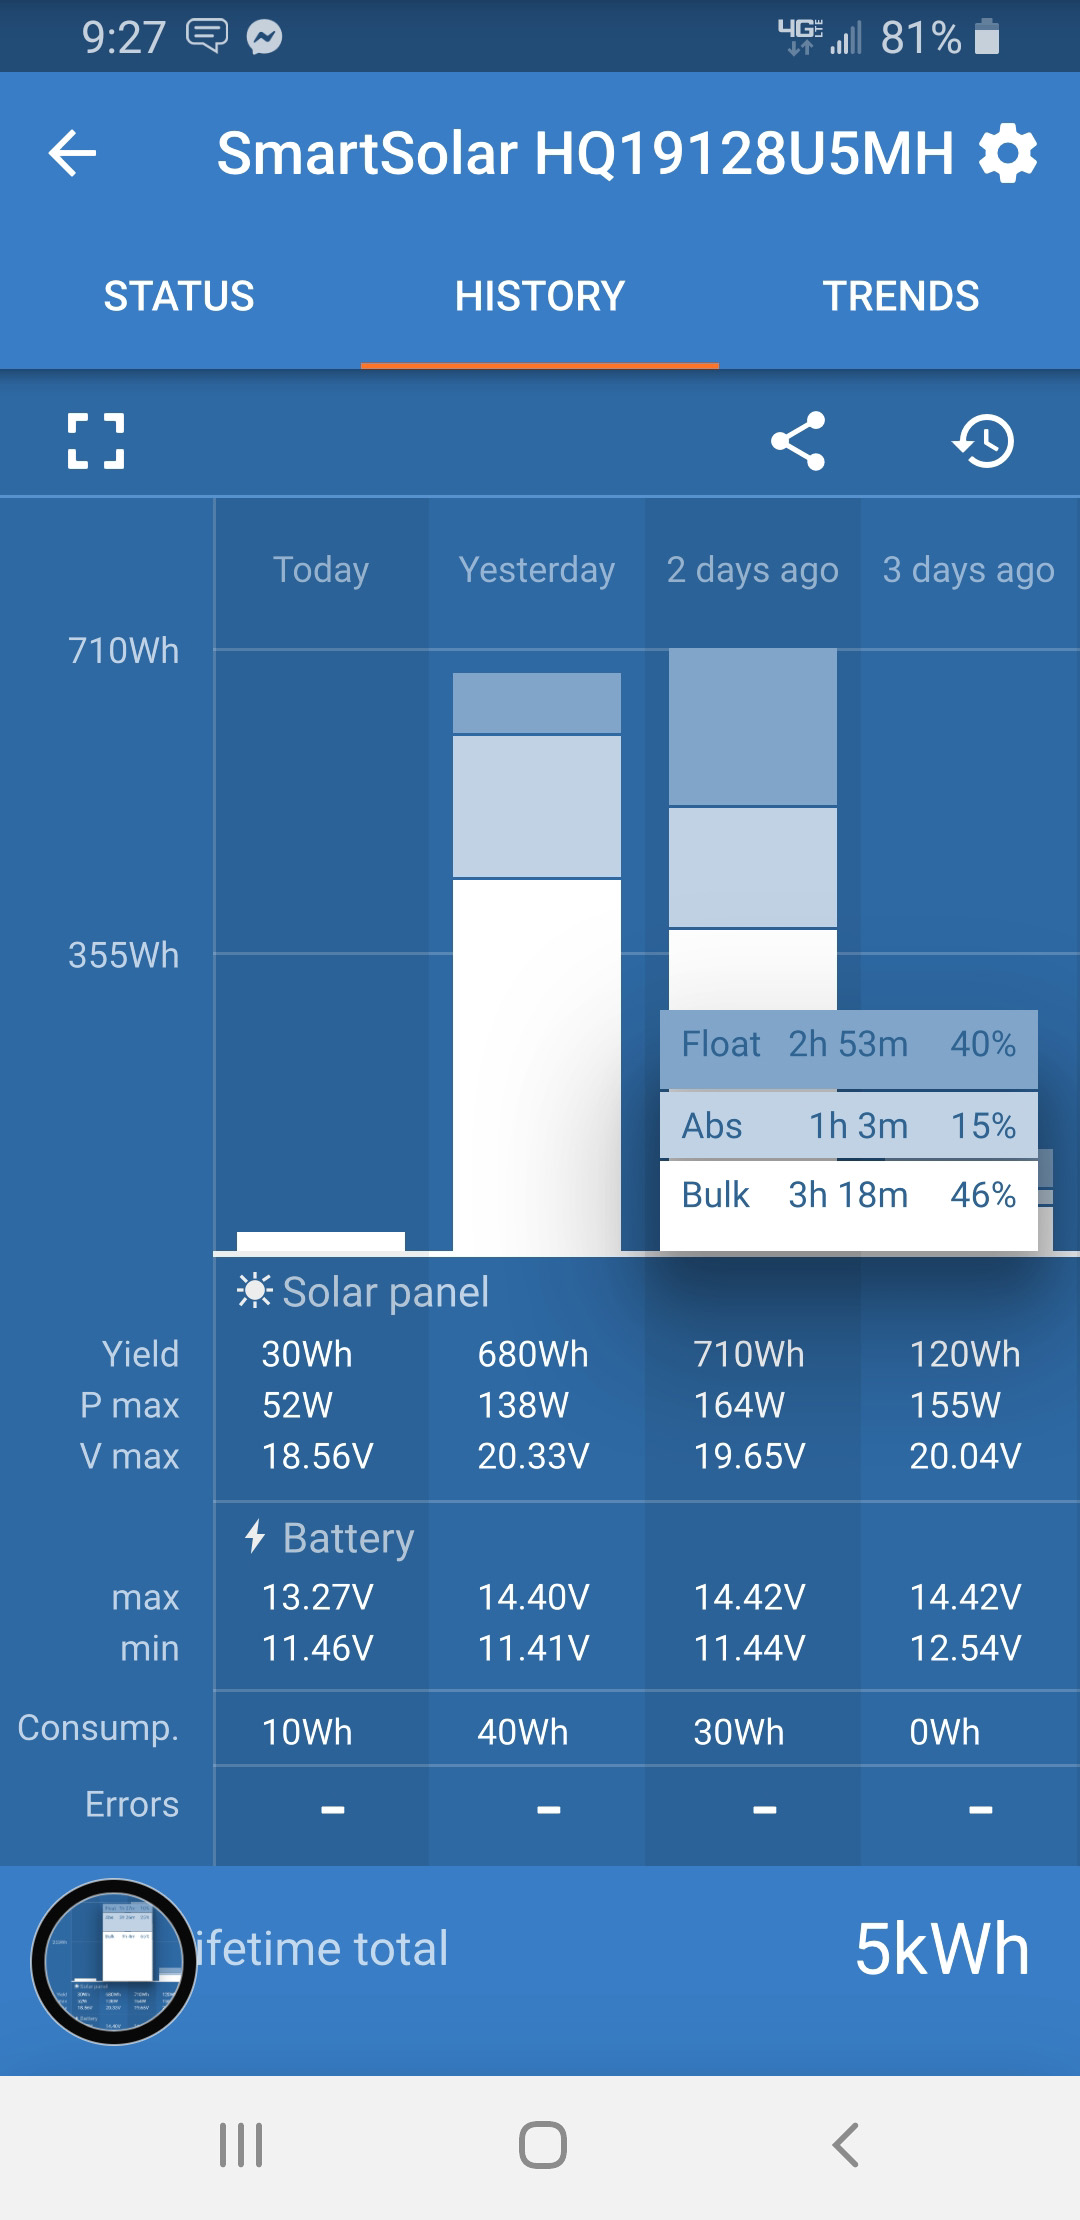
You can lose your mind trying to determine how much power you need, but we’ve found that 200 watts of solar is sufficient to recover our batteries even after running the inverter for morning coffee and evening movies even with our modest 200ah battery bank.

5 Comments
Mattisgreat · August 19, 2021 at 1:41 am
I was going to point out your misspelling, “Amps that shold never meet”, but I Googled it and there are traces in the far corners of the internets that allude to this being an obsolete alternative spelling of “should”. Personally, I think it’s a bunch of poor spellers trying to legitimize their collective errors. Psssh, just like you to use old timey obsolete spellings of words.
stillwinnie_yyk0a2 · August 19, 2021 at 3:35 pm
I hide a misspelling in every post to get you to read it.
Rosemary Gray · December 25, 2021 at 4:42 pm
LOL @ stillwinnie_yyk0a2 !! Great answer! 😀 …and thanks for the great article info.
John Hoffman · March 29, 2022 at 1:00 am
Love it! Planning to execute something almost identical in the near future.
Question: with Interstate lead-acid batteries, my understanding is you hurt them when going below 50% charge, which would mean your 200AH is effectively 100AH. Agree?
I ask, because we just bought a single 100AH Battleborn.
Allen · March 29, 2022 at 1:39 am
That’s correct. The money we saved on lithiums paid for the inverter and solar. When they go I’ll consider upgrading, but having a couple generators it’s not that critical.