Disclaimer: Doing anything I do is probably hazardous to your health and that of others. The summary below is my personal experience performing this repair and is meant to help travel trailer owners with the same issue understand the failure and how it’s repaired, not as a how-to guide. You’ll likely be killed, maimed, lose a finger or your pride if you try it, that’s on you. Contact your local dealer or BAL/Norco for repairs.
I’d been inspecting the frame on our 2019 Minnie Winnie 2606RL regularly after reading about the cracks that can occur on Winnebago travel trailers and other brands that use the same frame. I’d noted some distortion at what I thought was the correct bolt, but no cracking and I’d never seen this less-common model specifically mentioned as having the issue. Two weeks before a 5000 mile trip that had been planned for a year, a post on the Winnebago Travel Trailers forum prompted me to look again. Sure enough there were cracks and I joined the club. As a data point we had towed the 2606 around 5200 miles, never any further than across a campground with anything in our tanks, no gravel roads, no curb hopping, and our roads in the south are relatively good. Compared to some I’ve seen our problem had just started.
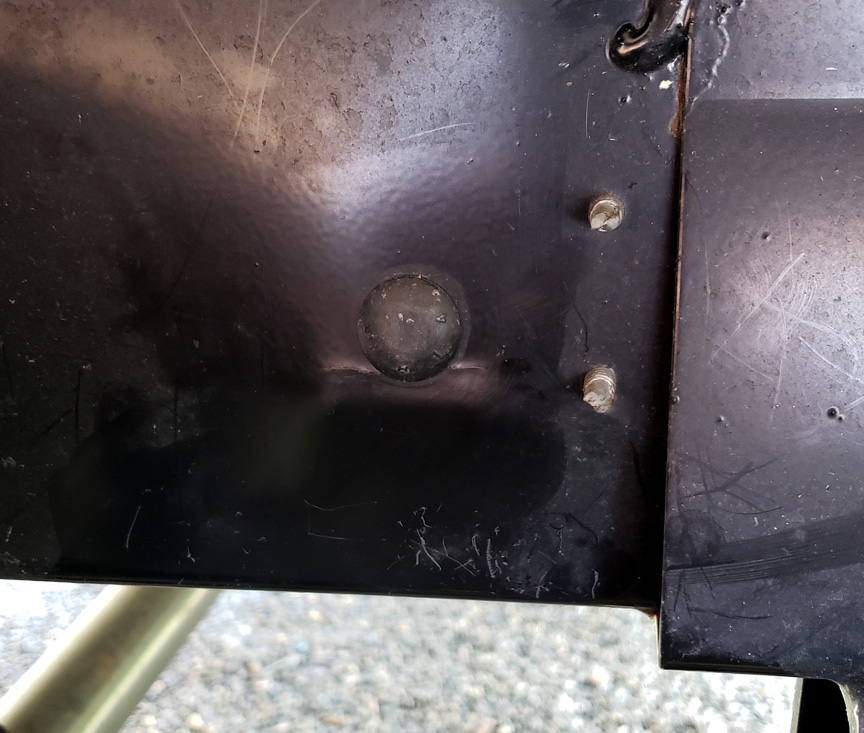
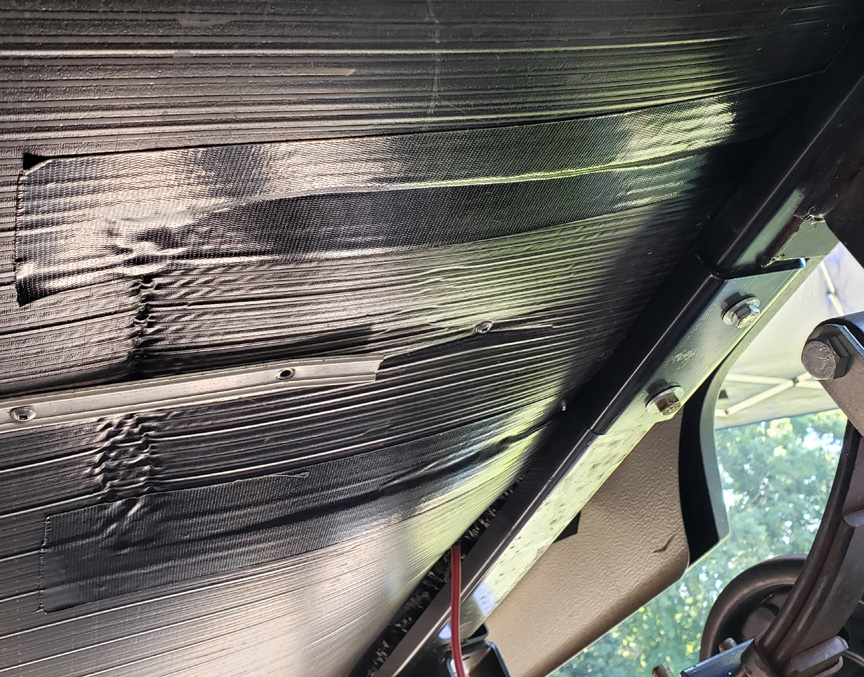
Right frame crack, left side looked almost identical. Note bulging. The plate on the right is the center spring hanger.
With little time available to address the issue I briefly considered fabricating my own repair plates, but opted to contact BAL/Norco directly. They were helpful and shipped the “service plate kit” to me at no charge. I understand that Winnebago or BAL/Norco will take care of the issue under warranty but that didn’t fit my timeline or level of patience. There is a subtle wisdom in using the factory repair parts and their installation method, whether you have someone else do it or do it yourself. Of course you can come up with your own repair solution and weld it, use different materials, methods or hardware, but if a subsequent problem develops you may find yourself trying to defend the notion that it was your repair that caused further issues.
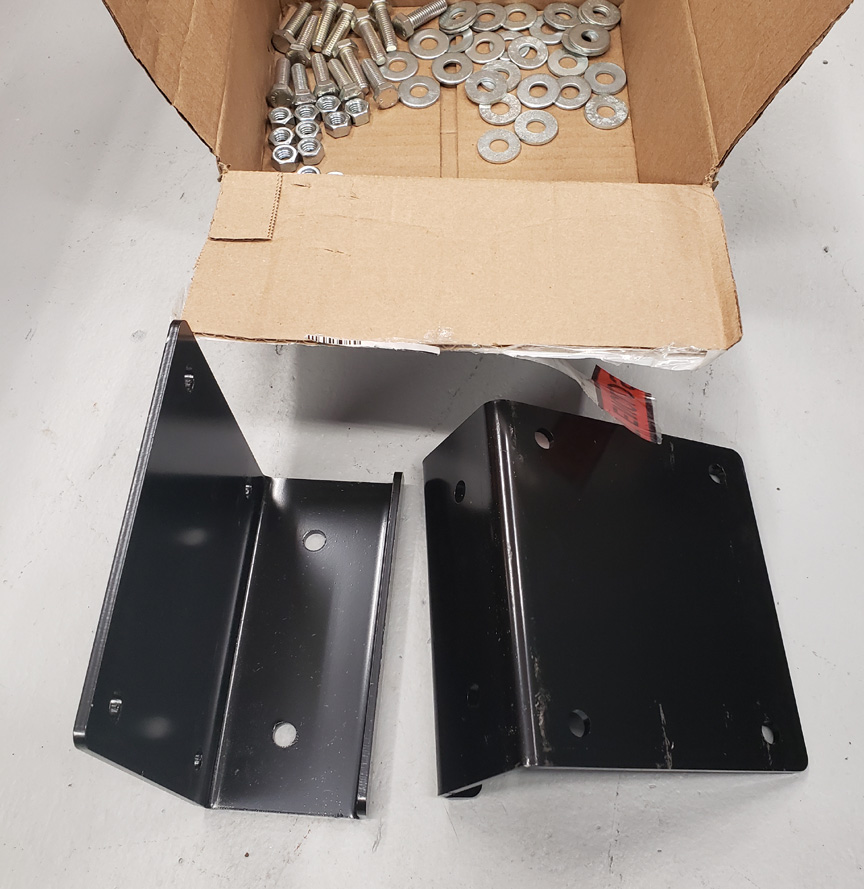
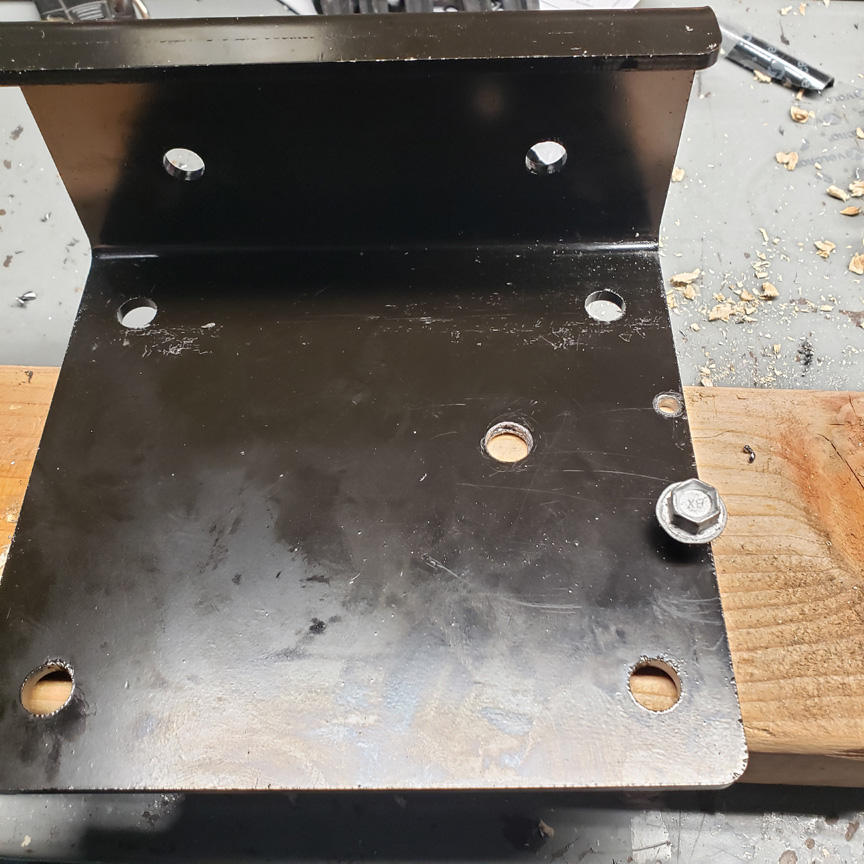
Service Plate Kit. Be sure to count your hardware.
The cause of the problem is the small surface area at the lower huck bolt where the cross member attaches to the frame. These frames aren’t rigid, they’re meant to bend and flex and there’s a great deal of load at this particular point adjacent to the center spring hanger.
View from inside the frame, right side. Upper huck bolt, lower huck bolt (note crack to the right and small mounting area). Left bolt/bracket is for the water tank support.
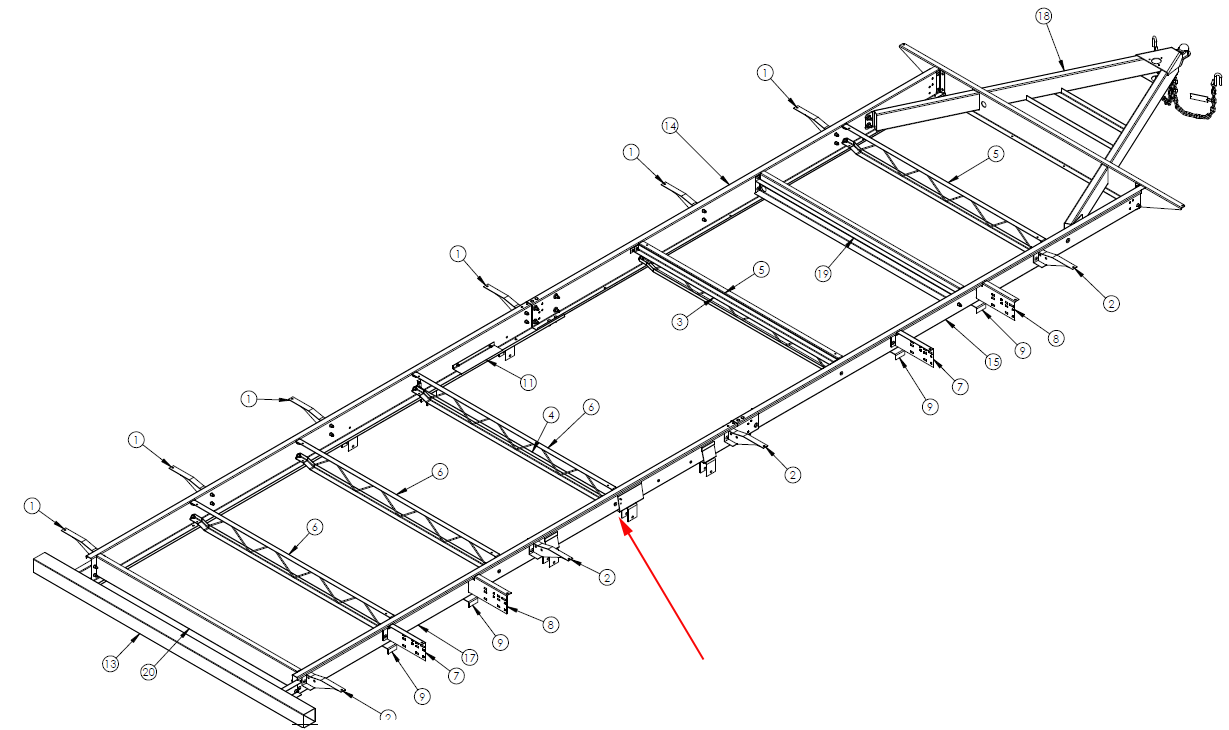
2606RL frame diagram, others similar, bolt noted with arrow.
In discussions with the BAL/Norco representative we breached the subject of what to do with the cracks beyond drilling a hole at the end of them. In testing they tried welding the cracks or just leaving them with the hole drilled per the instructions and found no difference in the longevity of the repair. When left alone the cracks didn’t grow any further after the plates were installed.
Documentation and instructions from BAL/Norco:
PDF’s
Service Plate Installation 21700145
Contact
BAL Technical Support 877-557-7788
Installation
I was able to install the plate and most of the bolts with the trailer weighted (on the ground) which is SOP for metal repair.
- Determine plate placement. Per the instructions the new hole you’ll drill for the bolt that replaces the huck bolt doesn’t have to be centered in the plate, but the closer the better.
- Cut the belly pan to allow access to the backside of the frame. My access cut was about 10″ wide and 10″ deep, and by cutting from the frame back towards the center of the trailer I made a flap that was easy to tuck back into the frame after the repairs.Tape the flap out of your way.
Belly pan taped back up after repairs.
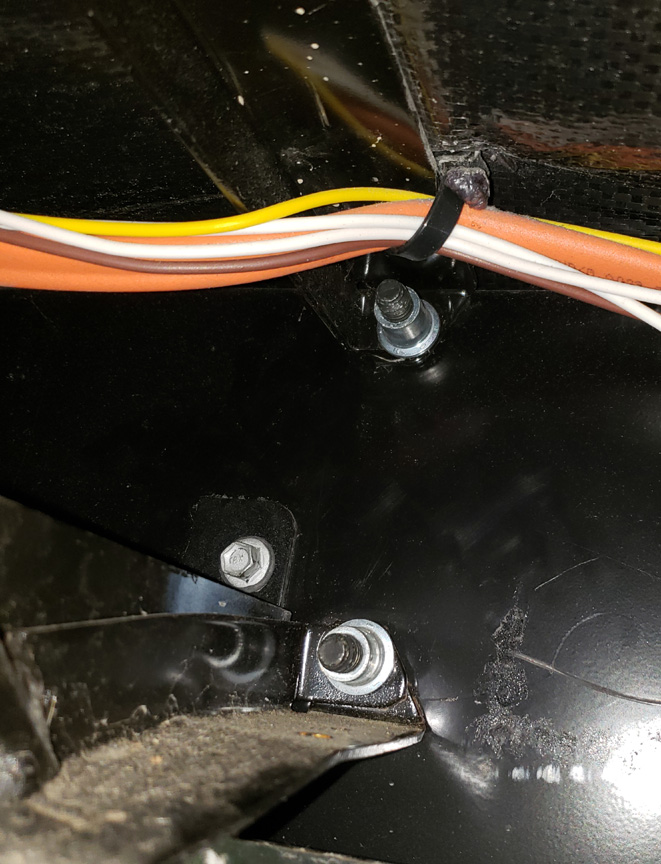
- Determine what else is in the way. My water tank support was adjacent to the cross-member which wasn’t a problem, but the screw heads sticking out where the repair plate needed to go were. Also a bit of wiring that needed to be avoided. The pre-drilled holes on the repair plate position the new bolts either above or below the existing cross member or tank support so I didn’t have to make any accommodations for these.
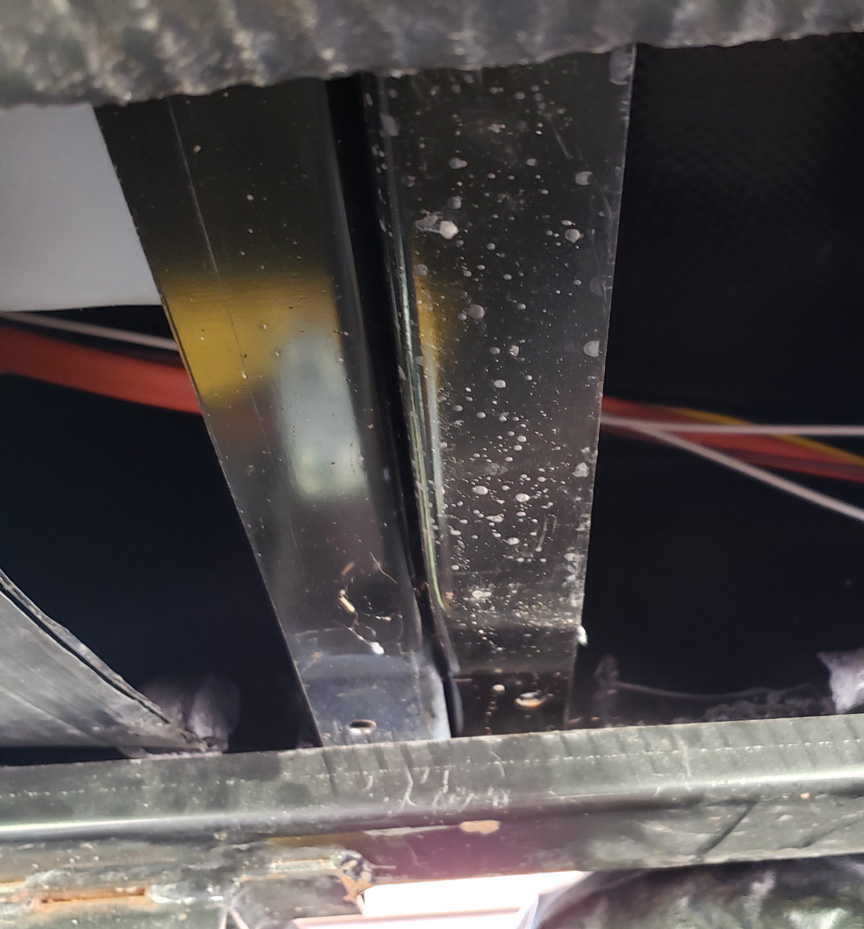
Cross member, right, and fresh tank support
- Grind off huck bolt from the outside. Probably the least fun part of the job as you don’t want to cut into the frame. I used a cutting wheel then a carbide cutting bit and knocked the center out with a punch when I got close. How you get there is up to you. The metal is softer than you’d expect though.
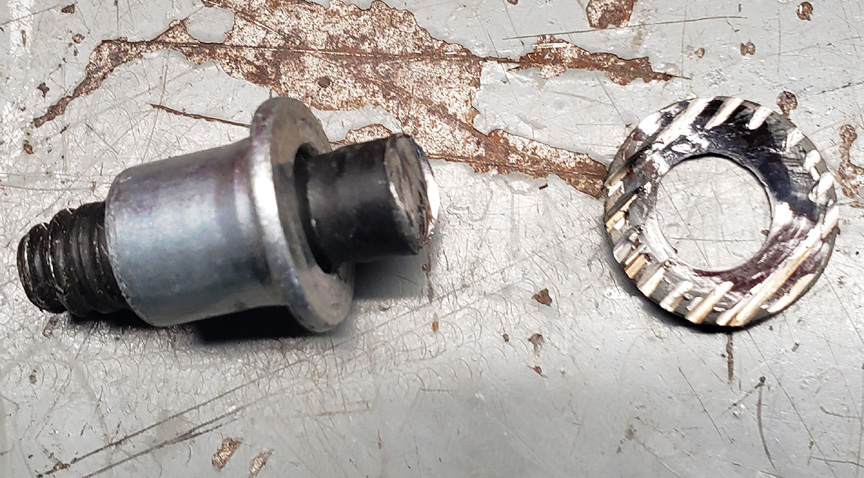
The notorious huck bolt
- Using a 1/8″ bit drill at the end of each crack. It’s not uncommon to have radial cracks, drill all you see.
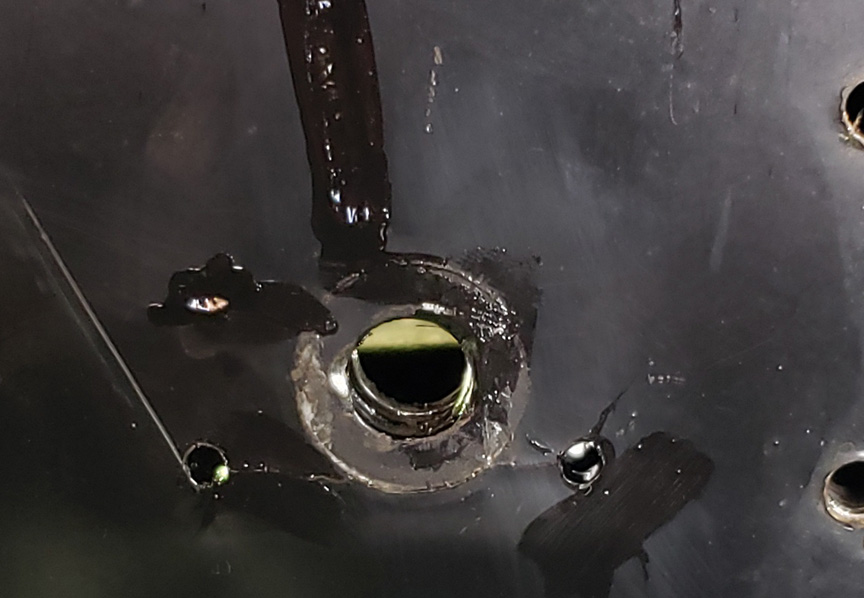
Holes drilled at the end of the cracks surrounding the hole where the huck bolt used to be.
- Refit plate. To get it flush with the bottom of the frame rail I used a couple of 3″ c-clamps vertically oriented on the inside of the frame. The right side slid on easily, I had to tap the left with a hammer as the frame was distorted. With the plate clamped in place use a scribe from the back side to mark the position for the replacement bolt. If you have other bolts that will need to pass through the plate (such as my water tank support screws) mark these too.
- Drill plate hole(s). You’ll never get the self-tapping screws through this thickness of plate without drilling holes in it.
- Refit plate with c-clamps, install center bolt. This hole isn’t negotiable, it has to be first. The pics show why. This is my left side, note the gap before the center bolt is tightened. The plates are substantially thicker than the frame, when you tighten the center bolt it will take the “bulge” out of the frame. That’s why you don’t want to pre-drill the other holes, things will move.
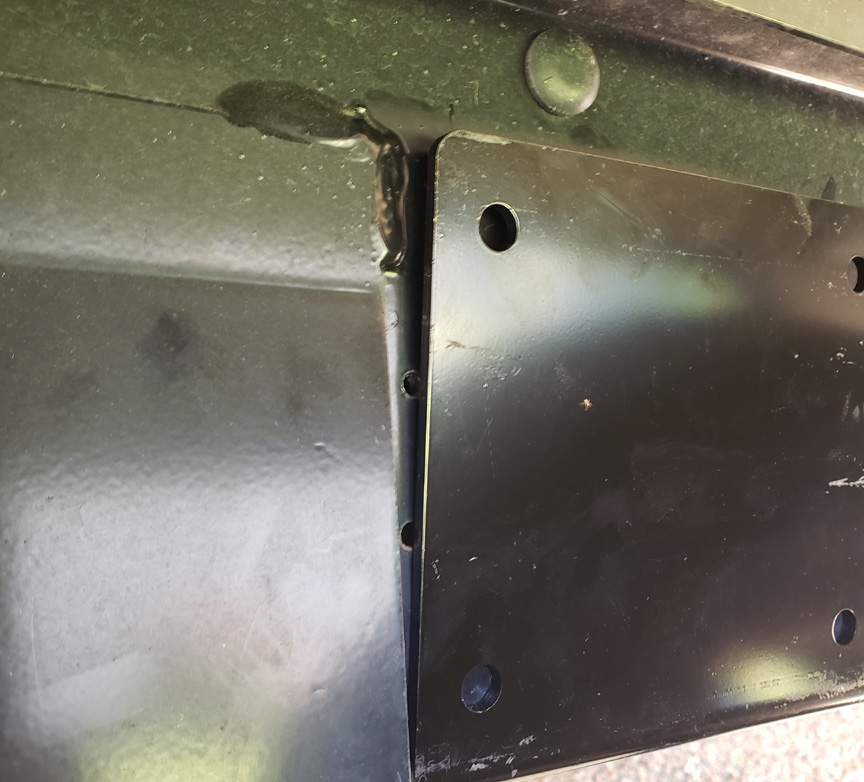
Left side gap
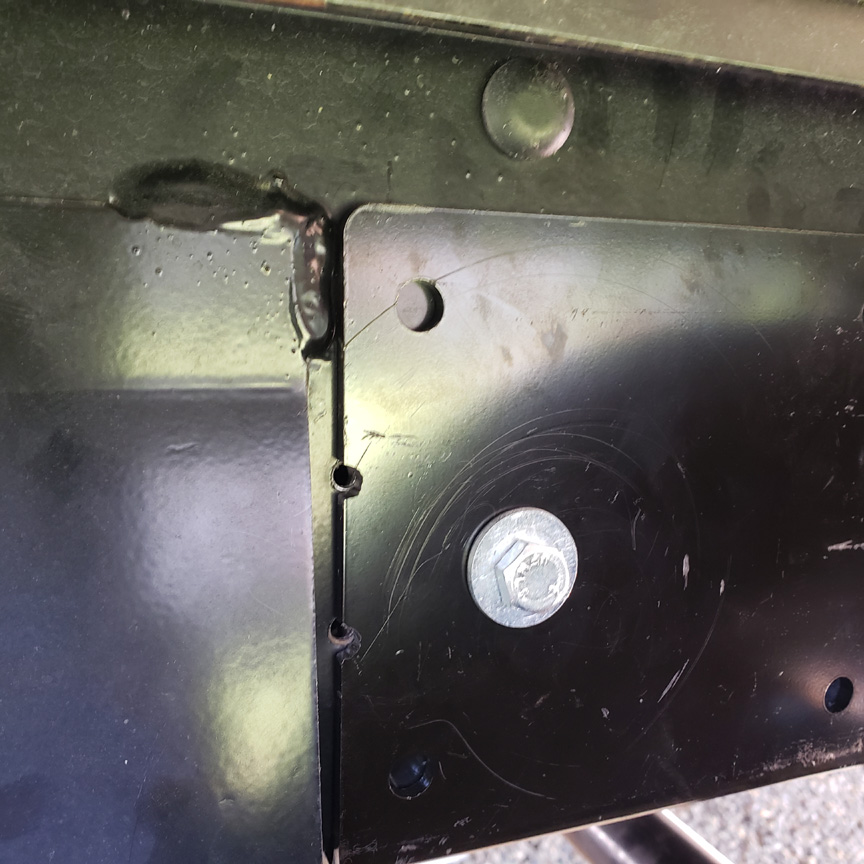
Left side first bolt (huck bolt replacement) tightened.
- Drill away. I used a center punch and pilot bit, but the plate is thick enough to use as a guide if you prefer.
- I had to remove the wheel to drill the last horizontal hole, with the suspension hanging I could drill one of the holes underneath. Raising the axle and getting the spring shackle to go vertical allowed me to drill the second vertical hole. It appears that you’ll need to drop the spring to drill these two holes, but the holes in the plate are offset enough to allow drilling.
- Torque, tape and clean up. It probably took a couple hours per side, LOTS of crawling underneath and back out again and not in any rush.
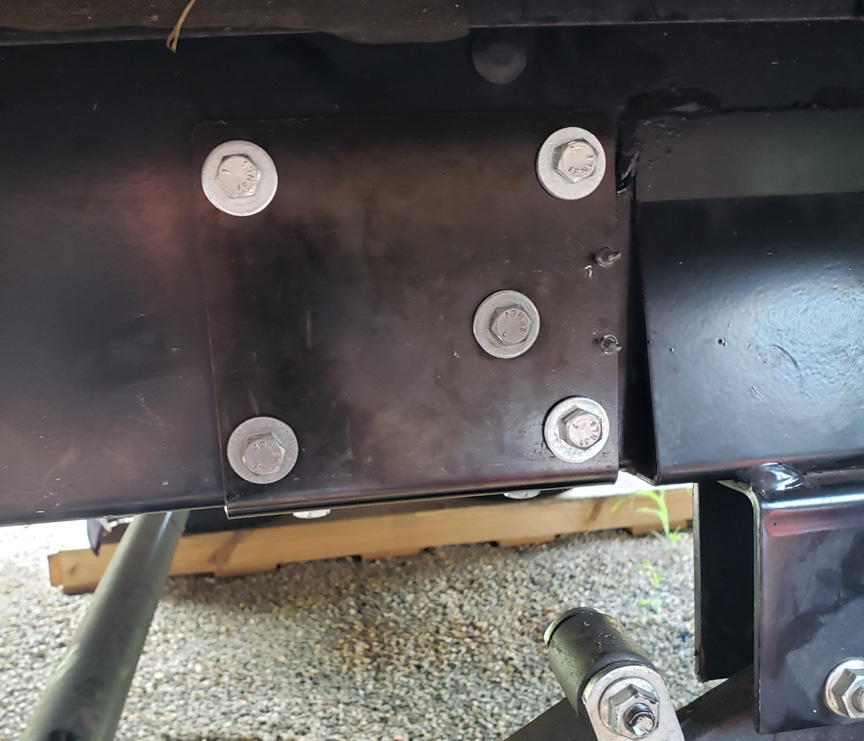
Right side completed
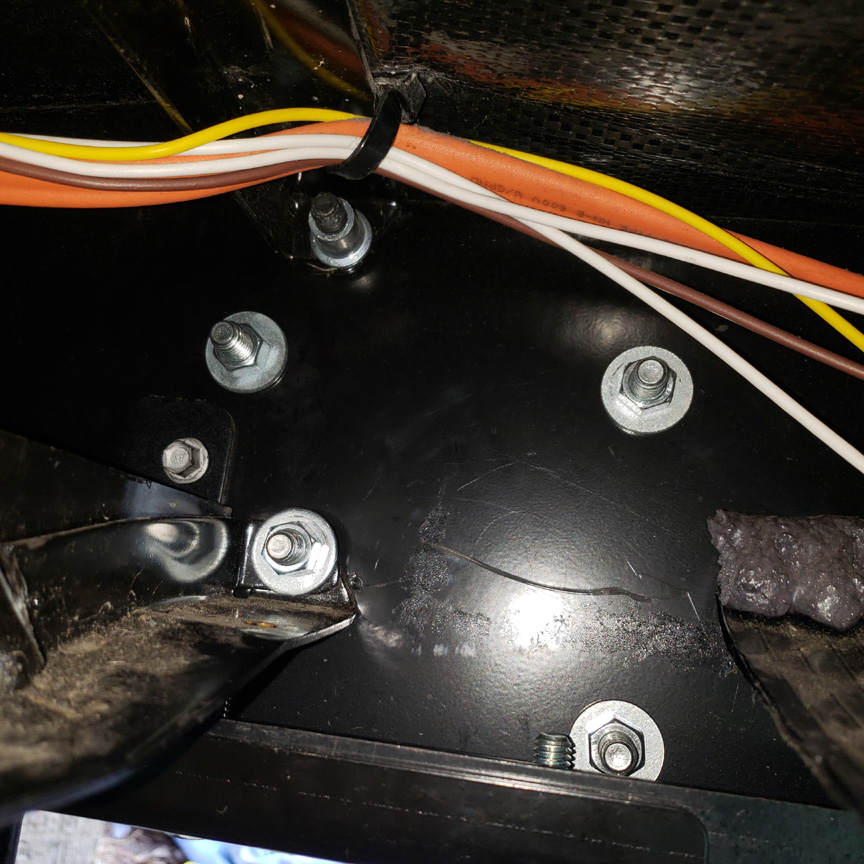
Plate installed, inside frame
- Post-Mortem. With the plate installed I’m convinced the issue is resolved once-and-for-all, as a matter of fact it’s probably overkill. Had the mating plate on the cross member where it attaches to the frame been a little larger, say 2″ square instead of 1″ square the problem most likely wouldn’t exist. Now the load is spread out across a huge area including the bottom channel of the frame.

6 Comments
Ralph · May 14, 2022 at 4:20 pm
I have similar but more extensive cracks on 2018 Lance trailer camper with Norco frame.
Has anyone else seen cracks on Lance campers?
Lance says they have never seen cracks before, and since they don’t make the frames, they want no responsibility. Imagine if you had cracks in your pickup truck frame and Ram or Ford said, we buy those frames in Mexico so we can’t help you with a fix for that.
I didn’t buy the frame from Norco. I bought it from Lance who purposed the frame for making their camper. If they didn’t test it, that is on them. Other things about the Lance say that they never take these campers out for testing or even camping themselves.
Allen · May 14, 2022 at 5:50 pm
Contact BAL directly at the link above. I didn’t contact Winnebago at all.
Ralph · May 24, 2022 at 10:28 pm
Contacted BAL and they were very helpful. Shipped a kit out right away.
John · September 15, 2024 at 3:38 pm
I have a 2019 Lance 2375 trailer with cracks that we don’t notice until the frame actually bent/broke. Full details with photos in this thread on the Lance Owners forums. Trailer is at the dealer waiting for repairs / resolution.
https://community.lanceowners.org/topic/damaged-failed-frame?reply=620162904608052015#620162904608052015
Gary McCaleb · October 17, 2022 at 2:06 pm
Nicely written; clear and concise. One thought—I’d think that not welding would leave the crack as a rust trap, and that the bolted plate similarly creates a moisture/rust trap right in the wheel well. I usually use some anti-rust undercoating (aerosol) and liberally apply before bolting up when doing repairs similar to this. So far out 2019 Minnie-the-Pooh has escaped cracks, but we are boondockimg more and more and I’d be surprised if we don’t join the crack club.
Glenn McIndoe · April 14, 2023 at 3:11 am
Yes very well written, I have a 2017 Premier 19FBPR with the same issue and pleased I found this.
It gives me a bit of confidence to go ahead with the repair above.
I believe the spring hanger connections are a bit light but this is a good place to start.